Sunday 21 August 2022

Spectaql for GraphQL API documentation

I had some moments lacking in clarity when I was trying Spectaql for the first time. The main issue was that cloning their source code and just trying to get things going gave me strange node.js package errors. 


https://github.com/anvilco/spectaql


So here are some quick instructions on what I did to generate the example API docs the Spectaql repo site recommends.  (I carried this out in Ubuntu Linux with node.js v.16.)


Make sure  you have git , nodejs (and npm) installed.


First clone the Spectaql project source code, so we can gain some  examples to learn from.

git clone https://github.com/anvilco/spectaql.git

This will download and create a project directory named 'spectaql'. In this source code directory, you will find an 'examples' directory.

ls -1 examples;

config.yml
customizations
data
output
themes


Make a new project directory elsewhere, e.g. 'spectaql_project1', and initialise it as a new project:

npm init

- accept all the defaults


Install the Spectaql packages into the project:

npm install --dev spectaql


Copy everything from the 'spectaql' project /examples directory from earlier into this directory.
The project directory should now look like:

ls -1;

config.yml
customizations
data
node_modules
output
package.json
package-lock.json
public
themes


Run this to generate Spectaql API docs:

npx spectaql config.yml


Check the new /public folder that should be created. This is where the generated API docs get outputted.

Open the 'index.html' file in there in a browser.


SpectaQL generated document


Saturday 6 March 2021

Data wrangling with the sqlite database and Python

In the previous post, I went over some basic stuff for using the sqlite database with the sqlite3 package for Python. Manipulating data with Python is so easy and time-saving, it really is a good idea.

This time I'm going over a common operation for data-wrangling that I found very useful. I will be:
- reading a CSV data file source (which has been exported or transformed from somewhere else)
- parsing the file to guess information about its columns and datatypes
- creating a sqlite database table automatically based on those guesses
- reading a batch of lines at a time from the CSV file, then
- inserting the batch of information into the new database table

After doing whatever I like to my new handy information in the database, I will be:
- fetching a batch of records at a time from the database
- writing the batch of records into a new CSV output file.
The point of that is that I want a better, wrangled final CSV containing just what I want, for purposes like training with it for machine learning.

To do this, I have some Python code files and my sample data CSV file. The scripts below will be just be run on the command line. You might also see some screenshots from SQLiteStudio (if you haven't got it, it's great! A GUI tool for sqlite).


First of all, I have a CSVHandler class to do my dirty work for me. This will read from or write to a CSV file. It will need methods to (a) make intelligent guesses on column data types, (b) read from a group of lines in the file at a time, and (c) append a set of lines to a CSV file at a time.

import csv

"""
A class for dealing with CSV files for
(a) reading from a CSV file
(b) writing to a CSV file
"""

class CSVHandler:
    fieldTypeString = "TEXT"
    fieldTypeInt = "INTEGER"
    fieldTypeFloat = "REAL"


    def __init__(self, inputFilePath="", outputFilePath=""):
        """Constructor:
        :param inputFilePath: a string to specify the path to a CSV file to read from.
        :param outputFilePath: a string to specify the path to a CSV file to write to.
        """
        self.inputFilePath = inputFilePath
        self.outputFilePath = outputFilePath


    def isFloat(self, s):
        """
        :param s: a string for a value.
        :rtype: bool
        """
        try:
            float(str(s))
            return True
        except ValueError:
            return False


    def isInt(self, s):
        """
        :param s: a string for a value.
        :rtype: bool
        """
        try:
            val = int(str(s))
            return True
        except ValueError:
            return False
                 

    def getColumnsInfo(self):
        """
        Attempts to make intelligent guesses to what data types for SQLite
        the records in a CSV file match to.
        :rtype: dict
        """
        sampleRows = self.readPartial(0, 24)
        firstRow = sampleRows[0]

        keys = [x for x in firstRow.keys()]

        # Do some checking for each column's values to see which data type it
        # *doesn't* match. Possible combinations:
        # {
        #     't_string': {'INTEGER': True, 'REAL': True},
        #     't_float': {'INTEGER': True, 'REAL': False}
        #     't_int': {'INTEGER': False, 'REAL': False},
        # }
        errorChecks = {}
        for key in keys:
            errorChecks[key] = {
                self.fieldTypeInt: False,
                self.fieldTypeFloat: False
            }

        for row in sampleRows:
            for key, value in row.items():
                if self.isInt(value) == False:
                    errorChecks[key][self.fieldTypeInt] = True
                if self.isFloat(value) == False:
                    errorChecks[key][self.fieldTypeFloat] = True

        info = {}
        for key in keys:
            if errorChecks[key][self.fieldTypeInt] == True and \
                    errorChecks[key][self.fieldTypeFloat] == True:
                info[key] = self.fieldTypeString # set a default data type
            elif errorChecks[key][self.fieldTypeInt] == True:
                info[key] = self.fieldTypeFloat
            else:
                info[key] = self.fieldTypeInt

        return info


    def getTotalRows(self):
        """
        Returns the total number of lines found in a CSV file.
        :rtype: int
        """
        with open(self.inputFilePath) as csvfile:
            csvReader = csv.reader(csvfile)
            for row in csvReader:
                pass
            return csvReader.line_num
            # Alternative counter:
            # gen = (row for row in csvReader)
            # return len(list(gen))
 

    def readPartial(self, limit=-1, offset=0):
        """
        Reads a set of lines from a CSV file.
        :param limit: a number of the max limit number of rows to read.
        :param offset: a number for the start index row to start reading at.
        :rtype: list
        """
        with open(self.inputFilePath) as csvfile:
            csvReader = csv.DictReader(csvfile)   
            for i in range(offset):
                next(csvReader)

            rows = []
            count = 0
           
            for row in csvReader:
                rows.append(row)
                count += 1
                if count == limit:
                    break
           
            return rows

    
    def writePartial(self, fieldNames, rows, isInitial=True):
        """
        Writes/appends a set of lines to a CSV file.
        :param fieldNames: a list of the column names for the CSV file header row.
        :param rows: info for a set of rows to be inserted (a list of dicts)
        :param isInitial: whether this will be the first row in the file (or not)
        """
        with open(self.outputFilePath, 'a') as csvfile:
            writer = csv.DictWriter(csvfile, fieldnames=fieldNames)
            if isInitial == True:
                writer.writeheader()
            for row in rows:
                writer.writerow(row)


Next, I'll need a class called DBConnector to deal with a SQLite database and one particular table. It will need to:
(a) Create a table based on info I give it,
(b) fetch the field names and total number of records in the table, and
(c) insert a batch of 'X' number of records
(d) fetch a batch of 'X' number of records

"""
An object for connecting to a SQLite database.
"""

import sqlite3


class DBConnector:

    def __init__(self, dbLocation):
        """Constructor:
        :param dbLocation: a string to specify the path to the database file.
        """
        self.connection = sqlite3.connect(dbLocation)
        self.connection.row_factory = sqlite3.Row
        self.cursor = self.connection.cursor()


    def createTable(self, tableName, columnsInfo):
        """
        Creates a new table in the database (if it doesn't exist yet).
        :param tableName: the new table's name.
        :param columnsInfo: a dict with info about table fields
        :rtype: dict
        """
        result = {"data": [], "errors": ""}
        # Build a list of column name / field type statements
        params = []
        for columnName, affinity in columnsInfo.items():
            params.append(columnName + " " + affinity)

        q = """create table {} (
id integer primary key autoincrement not null,
{}
)""".format(tableName, ",\n".join(params))
        try:
            self.cursor.execute(q, [])
            self.connection.commit()
            result["data"].append("success")
        except Exception as e:
            result["errors"] = str(e)
        return result


    def getTotalRows(self, tableName):
        """
        :param tableName: the new table's name.
        Returns the count of records in a query result.
        :rtype: dict
        """
        result = {"data": 0, "errors": ""}
        q = "select count(id) as total from " + tableName
        try:
            res = self.cursor.execute(q, ()).fetchone()
            if res is not None:
                result["data"] = res[0]
        except Exception as e:
            result["errors"] = str(e)
        return result


    def getFieldNames(self, tableName):
        """
        :param tableName: the new table's name.
        Returns the list of field names from a database table.
        :rtype: dict
        """
        result = {"data": [], "errors": ""}
        q = "SELECT name FROM PRAGMA_TABLE_INFO('" + tableName + "')"
        try:
            res = self.cursor.execute(q, ()).fetchall()
            for fieldRow in res:
                result["data"].append(fieldRow[0])
        except Exception as e:
            result["errors"] = str(e)
        return result


    def doBatchInsert(self, tableName, fieldNames, rowsBatch):
        """
        :param tableName: the new table's name.
        :param fieldNames: the list of fields
        :param rowsBatch: info for a batch of records (a list of dictionaries.)
        :rtype: dict
        """
        allParams = []
        recordVals = []
        # Build a query with bind parameters (?) where values should go.
        for row in rowsBatch:
            params = []
            for fieldName in fieldNames:
                params.append("?") # bind parameter
                allParams.append(row[fieldName])
            recordVals.append("(" + ", ".join(params) + ")")

        q = "insert into {} ({}) values {}".format(tableName,
            ", ".join(fieldNames),
            ",\n".join(recordVals)
        )

        return self.insert(q, allParams)


    def selectMany(self, q, params, limit=500, offset=None):
        """
        Runs a select query.
        :param q: the database query string.
        :param params: a list of any bound parameters to be inserted into the query string.
        :return result: a set of info from running the query
        :rtype: dict
        """
        result = {"data": [], "errors": ""}

        q += " limit " + str(limit)
        if offset is not None:
            q += " offset " + str(offset)

        try:
            res = self.cursor.execute(q, params).fetchall()
            result["data"] = [dict(row) for row in res]

        except Exception as e:
            result["errors"] = str(e)
        return result


Here is my first script to operate using those classes defined earlier 'insert_records_script.py'. It will (a) read an input CSV file to get info about its columns, (b) create a table in the database and (c) read a batch of CSV lines at a time, then (d) insert each batch at a time into the database.

from lib.DBConnector import DBConnector
from lib.CSVHandler import CSVHandler

"""
A script for inserting records from a source CSV file into a SQLite database
table.
"""

if __name__ == "__main__":
    csvFilePath = "./data/serious-injury-outcome-indicators-2000-19-csv.csv"
    dbFileLocation = "/home/scott/databases/sqlite/test_db1.db"
    newTableName = "test_tbl"
    batchSizeForInserting = 100

    # Read a source CSV file to extract some info about its number of rows and
    # typical data found in the columns.   
    csvHandler = CSVHandler(csvFilePath)
    columnsInfo = csvHandler.getColumnsInfo()
    totalRecords = csvHandler.getTotalRows()
    
    # Connect to the Database
    conn = DBConnector(dbFileLocation)

    # Create a table in the DB with field types based on intelligent guesses
    # from reading the CSV source data file.
    result = conn.createTable(newTableName, columnsInfo)

    # Insert a batch of records at a time, until all the rows from the CSV
    # file we read have been used up.
    fieldNames = columnsInfo.keys()
    for offset in range(0, totalRecords, batchSizeForInserting):
        print("Insert records at offset: " + str(offset))
        rowsBatch = csvHandler.readPartial(batchSizeForInserting, offset)
        result = conn.doBatchInsert(newTableName, fieldNames, rowsBatch)
        print(result)


This is me running the "insert" script:


Now I have my info in the sqlite3 database, sweet! It's so much easier to do common operations in a relational database than a clunky, inefficient spreadsheet. 


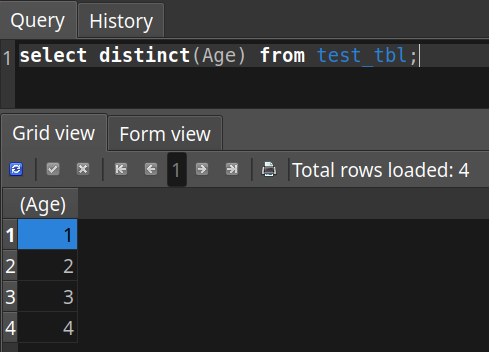
Now, as an example of something I want do for wrangling, there is a column in the table, 'Ages', that has text info. This info could be used to represent categories of data. To make operations on it later easier for things like machine learning, I want to transform the text values into numerical values so they can be counted more easily by applications like tensorflow. 


So I run some update commands, and now the values are numerical. I'm happy. I might also think about columns I won't need next time. 


update test_tbl set Age = '1' where Age = 'All ages';
update test_tbl set Age = '2' where Age = '0-74 years';
update test_tbl set Age = '3' where Age = '75+ years';
update test_tbl set Age = '4' where Age = '0-14 years';


I want to now export the data out of the SQLite database table and into a new CSV output file. My next script 'retrieve_records_script.py' will:
(a) Find out what the table columns are and the number of records I'm dealing with, and (b) fetch a batch of records at a time from the database, then (c) write each batch of records to an output CSV file. 

from lib.DBConnector import DBConnector
from lib.CSVHandler import CSVHandler

"""
A script for fetching records from a SQLite database, and writing them into
a new output CSV file.
"""

if __name__ == "__main__":
    csvFilePath = "./data/new_serious-injury-outcome-indicators.csv"
    dbFileLocation = "/home/scott/databases/sqlite/test_db1.db"
    newTableName = "test_tbl"
    batchSizeForFetching = 100

    # Connect to the Database
    conn = DBConnector(dbFileLocation)

    totalRecords = conn.getTotalRows(newTableName)["data"]
    fieldNames = conn.getFieldNames(newTableName)["data"]

    csvHandler = CSVHandler(inputFilePath="", outputFilePath=csvFilePath)

    # Fetch a batch of records at a time from the database, then write the
    # batch to an output CSV file.
    batchFetchQuery = "select * from " + newTableName
    params = ()
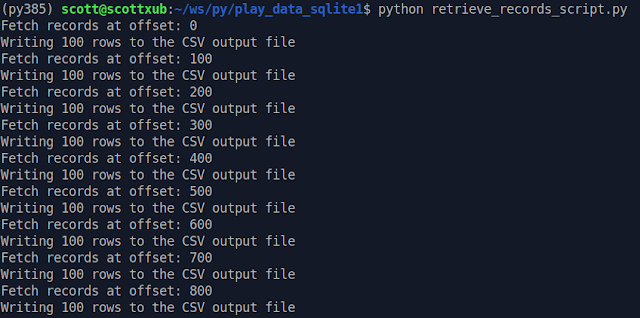
    for offset in range(0, totalRecords, batchSizeForFetching):
        print("Fetch records at offset: " + str(offset))

        # Select query
        result = conn.selectMany(batchFetchQuery, params, batchSizeForFetching, offset)

        # Write the batch of records to the output CSV file
        print("Writing " + str(len(result["data"])) + " rows to the CSV output file")
        isInitial = False
        if offset == 0:
            isInitial = True
        csvHandler.writePartial(fieldNames, result["data"], isInitial)

    print("CSV output file written: " + csvFilePath)


Here's me running the 'retrieve' script.


And here's my new CSV output file. All's well that end's well! I have a file that an application can suck in my wrangled data easily, and I didn't nearly crash my computer waiting for Excel to do unwieldy data operations.


Thursday 25 February 2021

Using the SQLite database in Windows with Python

SQLite is a lightweight database that is very useful anywhere if you're data wrangling or being a developer. The package for Python that interfaces with it is sqlite3, and you'll usually find it already installed in your Python 3.

I found myself recently doing a developer challenge where I had to do a lot of wrangling with data. I needed a little database to hold my info for a short while, with an easy interface. I was already in Windows and using Python to manipulate the source data, so a sqlite database and the Python sqlite3 package was the obvious solution. This guide is for people using Windows 10 (64 bit) and Python 64-bit also.

Install the SQLite database and tools


Go to the SQLite website and download the zipped files for: "sqlite-dll-win64-x64" and "sqlite-tools".
https://sqlite.org/download.html
 

SQLite download files


Unzip both these once they've downloaded.
Make a new folder somewhere handy on your machine, e.g. C:\Sqlite.
Copy all the files from the two unzipped folders into your new folder. 


Add the new folder with your SQLite files to your Environment Variable, Path.


Test that it works


Open a command shell (just plain "cmd")
type:
sqlite3

You should see the sqlite shell start.

Create a new database, specifying the path where it is to be stored and the database's name, e.g.
.open C:/Users/scott.davies/Documents/ws/py/team_loki_ml/data/ml_loki.db
- note, you will need to convert backslashes from Windows file paths to forward slashes
- afterwards, you should see the database file created if you look in Windows Explorer

Try some sqlite commands in the shell, like creating a new table and inserting a record into it:

create table config (
id integer primary key autoincrement not null,
item nvarchar(255),
value nvarchar(255)
);

insert into config
(item,
value)
values
('dummy',
'test');


Write some sqlite3 code in Python

Find a trusty text editor (I'm using Sublime) and create a new Python code file. 


Try come CRUD queries on the database table you created earlier (Create, Update, Insert Delete). There are all sorts of features in the below example you can read about in tutorials on the web, like what a cursor is, and the bind parameters to put in query strings. Also note that:

- modify queries have "connection.commit()" afterwards, so their effect on the database will be immediate

- at then end, we need to close down the cursor and the database connection.

Below is the Python code file I am naming "sqlite_test1.py".


import sqlite3

# Created a sqlite DB file & table first
# create table config (
# id integer primary key autoincrement not null,
# item nvarchar(255),
# value nvarchar(255)
# );

def selectQuery(cursor):
    q = "SELECT id, item, value FROM config WHERE item = ?"
    params = ("my_config_item",)
    rows = cursor.execute(q, params).fetchall()
    print(rows)


if __name__ == "__main__":
    connection = sqlite3.connect("C:/Users/scott.davies/Documents/ws/py/team_loki_ml/data/ml_loki.db")

    print(connection.total_changes)

    cursor = connection.cursor()

    q = """insert into config
    (item,
    value)
    values
    (?,
    ?)""";

    params = ("my_config_item", "a value",)

    result = cursor.execute(q, params)
    connection.commit()
    print("cursor.lastrowid: " + str(cursor.lastrowid))

    selectQuery(cursor)

    q = "update config set value = ? where item = ?"
    params = ("updated", "my_config_item")
    cursor.execute(q, params)
    connection.commit()

    selectQuery(cursor)

    q = "delete from config where id > 0"
    cursor.execute(q, ())
    connection.commit()

    cursor.close()

    connection.close()


Run the code file in a command shell (make sure you have changed directory into the right place first):

python sqlite_test1.py 


You should see queries like the ones in my example above working and printing out output.


Make it object-oriented

Next, I found it might be a good idea to note write such a rough script from now on to try things out, especially since I needed to wrangle some data in a manageable fashion. I decided to (a) make a folder named "lib" to put modules in, (b) make a class called "DBConnector" to handle SQLite database query calls for me, and (c) make a script to create the queries, and use the DBConnector. My tiny project' structure looks like this:


├── lib
│   ├── DBConnector.py
│   └── __init__.py
└── sqlite_test2.py


Here is the code for DBConnector.py:

"""
A module for connecting to a SQLite database.
"""

import sqlite3


class DBConnector:

    def __init__(self, dbLocation):
        """Constructor:
        :param dbLocation: a string to specify the path to the database file.
        """
        self.connection = sqlite3.connect(dbLocation)
        self.cursor = self.connection.cursor()


    def insert(self, q, params):
        """
        Runs an insert query
        :param q: the database query string.
        :param params: a list of any bound parameters to be inserted into the query string.
        :return result: a set of info from running the query
        :rtype: dict
        """
        result = {"data": [], "errors": ""}
        try:
            self.cursor.execute(q, params)
            self.connection.commit()
            result["data"].append("success")
        except Exception as e:
            result["errors"] = str(e)
        return result


    def selectMany(self, q, params):
        """
        Runs a select query
        :param q: the database query string.
        :param params: a list of any bound parameters to be inserted into the query string.
        :return result: a set of info from running the query
        :rtype: dict
        """
        result = {"data": [], "errors": ""}
        try:
            result["data"] = self.cursor.execute(q, params).fetchall()
        except Exception as e:
            result["errors"] = str(e)
        return result


    def update(self, q, params):
        """
        Runs an update query.
        :param q: the database query string.
        :param params: a list of any bound parameters to be inserted into the query string.
        :return result: a set of info from running the query
        :rtype: dict
        """
        result = {"data": [], "errors": ""}
        # You could do some validating of the query and paramters in places like this...
        try:
            self.cursor.execute(q, params)
            self.connection.commit()
            result["data"].append("success")
        except Exception as e:
            result["errors"] = str(e)
        return result


    def delete(self, q, params):
        """
        Runs a delete query
        :param q: the database query string.
        :param params: a list of any bound parameters to be inserted into the query string.
        :return result: a set of info from running the query
        :rtype: dict
        """
        result = {"data": [], "errors": ""}
        try:
            self.cursor.execute(q, params)
            self.connection.commit()
            result["data"].append("success")
        except Exception as e:
            result["errors"] = str(e)
        return result


And here is my script "sqlite_test2.py" for calling it:

from lib.DBConnector import DBConnector


if __name__ == "__main__":
    dbFileLocation = "C:/Users/scott.davies/Documents/ws/py/team_loki_ml/data/ml_loki.db"
    conn = DBConnector(dbFileLocation)

    # Insert query
    q = """insert into config
    (item,
    value)
    values
    (?,
    ?)""";
    params = ("data_dir", "C:/Users/scott.davies/Documents/VBoxShared/202102/hackathon_data_2021",)
    result = conn.insert(q, params)
    print(result)


    # Select query
    q = "SELECT id, item, value FROM config WHERE item = ?"
    params = ("data_dir",)
    result = conn.selectMany(q, params)
    print(result)


    # Update query
    q = "update config set value = ? where item = ?"
    params = ("updated", "data_dir")
    result = conn.update(q, params)
    print(result)


    # Delete query
    q = "delete from config where id > ?"
    params = (0,)
    result = conn.delete(q, params)
    print(result)


I will run the script like:

python "sqlite_test2.py"

And the output, as a result of the Python sqlite3 queries on my database will look like:


Wednesday 23 December 2020

Get started with Python / GTK3 / PyGObject in Ubuntu

 I found myself needing to make a GUI tool for work using a recent version of Ubuntu. These are the steps I followed.


*Install Ubuntu packages needed


sudo apt install pkg-config libglib2.0-dev libgtk-3-dev libgirepository1.0-dev;

You should already have python3 by default.

Note, in Ubuntu 20 you may also need these packages as well for the pycairo/wheels dependency:

sudo apt install libcairo2-dev python3-dev;


*Create a virtual env and set permissions


(Note: You will need to install the package for pip3 for python 3 if it is not already installed)

Choose a location on your machine to hold your python virtualenv, e.g mine will be "/opt/python3".

Find your python 3 path, e.g.

which python3

- mine is /usr/bin/python3


pip3 install virtualenv;


sudo mkdir -p /opt/py3env;

sudo chown scott:scott -R /opt/py3env;

sudo chmod 777 -R /opt/py3env;

virtualenv -p /usr/bin/python3 /opt/py3env;


*Start using the new virtualenv


source /opt/py3env//bin/activate;

pip install --upgrade pip


*Install PyGObject in the virtualenv

pip install pygobject

See the output: 

Successfully installed pycairo-1.20.0 pygobject-3.38.0


*Try a "hello world" program


Save this code in an editor, e.g. as a file named "hello_world.py": 


#!/usr/bin/env python


import gi


gi.require_version("Gtk", "3.0")

from gi.repository import Gtk


window = Gtk.Window(title="Hello World")

window.show()

window.connect("destroy", Gtk.main_quit)

Gtk.main()


*Run the program on the command line:

python hello_world.py


You should see a small GUI window appear! (You might need to stretch it to see its title bar "Hello World")


Saturday 21 November 2020

OctoberCMS Get Up & Go Guide

OctoberCMS is a neat project for creating online content, written in PHP. I recently had to restart some projects I made with it on a new laptop, so I've made this post basically so I don't have to remember the steps all over again.


Below are some instructions (mainly just for myself) on getting up and running with OctoberCMS on a local machine. This assumes you are using a recent version of Ubuntu and have LAMP installed already.

Create an empty MySQL database


Enter these MySQL commands:
create database test_october1;
create user oct_user@localhost identified by 'enter_password_here';
use test_october1;
grant all on test_october1.* to oct_user@localhost;
flush privileges;


Install required PHP packages:

sudo apt-get update && sudo apt-get install php php-ctype php-curl php-xml php-fileinfo php-gd php-json php-mbstring php-mysql php-sqlite3


Download the OctoberCMS installer file

The local web directory I'm going to be using is just:
/home/scott/ws/php/october_projects/toct1

In a browser, go to octobercms.com/download
Unzip the install-master.zip file
Then copy its contents to your web directory, e.g.:
cp -r /home/scott/Downloads/octobercms/install-master/* .

Set directory permissions:
chown scott:www-data -R october_projects/;
chmod 770 -R october_projects


Set up a virtualhost for the OctoberCMS site using Apache


mkdir /etc/apache2/logging/;
chown -R www-data:www-data /etc/apache2/logging/;
chmod 770 -R /etc/apache2/logging/;

cd /etc/apache2/sites-available/;
nano testoct.localhost.conf


Type this:

<VirtualHost *:80>
 ServerAdmin username@abcs.co.nz
 DocumentRoot "/home/scott/ws/php/october_projects/toct1"
 ServerName testoct.localhost
 ServerAlias www.testoct.localhost
 <Directory "/home/scott/ws/php/october_projects/toct1">
 Options Indexes FollowSymLinks Includes ExecCGI
 AllowOverride All
 Require all granted
 </Directory>
 ErrorLog "logging/testoct-error.log"
 CustomLog "logging/testoct-access.log" common
</VirtualHost>


sudo a2ensite testoct.localhost;
sudo systemctl reload apache2;

sudo nano /etc/hosts


Enter this:
127.0.0.1       testoct.localhost

Run the Install wizard 


In a browser, test this by going to:
http://testoct.localhost/install.php

This will start an install wizard
- you will see a checks screen. If all is OK, push Continue


- Enter the database details and set up the administrator credentials. Continue 


- On the last step, click Start from scratch. This will create an empty installation with a simple demo theme.


You can see a demo page at:

http://testoct.localhost

Go to the admin section:
http://testoct.localhost/backend
-log in
-if you get an error trying to go to the admin page, you might need to enable mode_rewrite for Apache:
sudo a2enmod rewrite


Create content! 


I suggest you can then add some static pages. A good tutorial is here:
https://www.sitepoint.com/getting-started-with-october-cms-static-pages/


 Here's a screenshot of my first OctoberCMS page using my own partials showing up (oh the great CSS, haha):


Friday 10 April 2020

Get Netbeans browser debugging going with PHP and Xdebug

This was done with Ubuntu v.19.10 and Netbeans v.11.
-got this going in both Firefox and Chromium browsers


Make sure xdebug is installed
sudo apt-get install php-xdebug
-check this works OK in some phpinfo output in a web page


-in your browser, install the XdebugHelper extension/add on
-make sure in the extension's Preferences/Options, set the session key to the preset for Netbeans


Firefox view


Chromium view


-add these lines in the PHP ini file for Xdebug, e.g.
in /etc/php/7.3/apache2/conf.d/20-xdebug.ini:
xdebug.remote_enable=on
xdebug.idekey = netbeans-xdebug
xdebug.remote_host = localhost
xdebug.remote_port = 9000
xdebug.remote_handler = dbgp


You may also want to check your Apache php.ini file for output_buffering=off.

Restart Apache:
systemctl restart apache2

You might have to restart the browser and Netbeans to get this all going
In Netbeans, make sure your project's Properties has the PHP version as the right one (e.g. 7.3). Also the run configuration should be "Local web site (running on local web server" 
Add a breakpoint in a margin
Go to Debug >Debug Project
In browser, go to a page. Click the little extension bug icon, choose Debug


Refresh the page in the browser.

Go back to Netbeans.
-the code execution in the IDE should stop at the line, and highlight the breakpoint line green (with dark theme)
Push F5 / F8 to carry on execution


Saturday 2 March 2019

A Desktop GUI form with the PHP UI extension

Intro


As a follow on to last week's post, this week I am again exploring out the PHP UI extension which lets you create desktop PHP 7 programs. My mission this time is set up a basic form for letting you type some inputs in boxes, push a button and see an output somewhere else.

What's up, doc?


OK, so the only real documentation the UI extension seems to have (at the time of writing) are some pages on php.net website. There is also the "gallery.php" example file from the project itself, which shows you ways to put elements on a GUI window.


Keep It Simple, Stupid


I just want to make a simple window with a form and button. So, after playing around with some of the ways to do things demonstrated in the "gallery.php", I found out a way for beginners to do things but it's not perfect.

A beginner has a choice of trying things with Box, Group, Grid and Form elements. The Grid element is especially useful because it lets you set a size on elements it will contain, and position it in relation to other elements. However, Form is the thing to stick with when you first try things out. The full source code for the example can be found at the end of this blog post.

At the top of your PHP code file, you will need to insert "use" statements for the elements you're going to put in your window, e.g.

use UI\Window;
use UI\Controls\Form;


Showing Good Form


A Form element is created like this, and you can append more elements within it:

$entryForm1 = new Form();
$entryForm1->setPadded(true);
$entryForm1->append("", new Label("Enter text to match with a reg ex"));


I also want to multiline (MultilineEntry) inputs, which I'll append to the form later:

$haystackEntry = new MultilineEntry(MultilineEntry::Wrap);
$outputEntry = new MultilineEntry(MultilineEntry::Wrap);


I further have the need to put "spacing" rows between lines. I've tried various ways to do this but the quick way to this is just to append a blank Label, which act like an empty row, e.g.

$entryForm1->append("", new Label(""));

Push My Button


It's easy to add a button to a form. However, I need a button that will execute an specific action once its event is triggered, i.e. the button is clicked. To do this, it looks like we have extend the UI's Button class and put in the functionality we need it to do for us. Here's my effort:

/**
 * The class extends the UI's Button class, so there is an onClick method we can
  * use as an event handler.
 */
class ButtonSubmit extends Button {
   
    public function __construct(string $text,
        MultilineEntry $inputHaystackCtrl,
        MultilineEntry $inputRegexCtrl,
        MultilineEntry $outputCtrl
    ) {
        $this->inputHaystackCtrl = $inputHaystackCtrl;
        $this->inputRegexCtrl = $inputRegexCtrl;
        $this->outputCtrl = $outputCtrl;

        parent::__construct($text);
    }
   
    /**
     * When the button is clicked, take the "haystack" text from one entry input
     * and try to match it with the regular expression in the other entry input.
     * Show a result in the output input.
     */
    protected function onClick() {
        $matches = "";
        $haystackString = $this->inputHaystackCtrl->getText();
        $regExToMatch = $this->inputRegexCtrl->getText();
        preg_match($regExToMatch, $haystackString, $matches, PREG_OFFSET_CAPTURE);
        $outputMessages = ["You entered: " . $haystackString . "."];
        $outputMessages[] = "Number of matches: " . count($matches);

        $this->outputCtrl->setText(implode("\n", $outputMessages));
    }

    private $inputHaystackCtrl;
    private $inputRegexCtrl;
    private $outputCtrl;
};


Then add my button to the form:

$entryForm1->append("", $btnSubmit);

Open the Window


$window = new Window("Regex form", new Size(640, 480), true);
$window->add($entryForm1);

Then call the window show() method, and start the UI interaction loop:

UI\run();

When you run your php program, you'll see your form window appear. You'll also probably notice that the button element is unusually wide; we can't resize it. I did say the Form element was good to learn but not perfect ;-)


Get Trigger Happy


Enter some text in the "Text" mulitline input. The click the Submit button to see if the event gets triggered.


So, there you have it - a simple form with a button that executes an event. It might not be a competitor for Windows Forms, but it's a start.

Full Source Code


<?php
use UI\Size;
use UI\Window;
use UI\Controls\Form;
use UI\Controls\Button;
use UI\Controls\MultilineEntry;
use UI\Controls\Label;


// Lets make a button with custom features to handle inputs
/**
 * The class extends the UI's Button class, so there is an onClick method we can
  * use as an event handler.
 */
class ButtonSubmit extends Button {
   
    public function __construct(string $text,
        MultilineEntry $inputHaystackCtrl,
        MultilineEntry $inputRegexCtrl,
        MultilineEntry $outputCtrl
    ) {
        $this->inputHaystackCtrl = $inputHaystackCtrl;
        $this->inputRegexCtrl = $inputRegexCtrl;
        $this->outputCtrl = $outputCtrl;

        parent::__construct($text);
    }
   
    /**
     * When the button is clicked, take the "haystack" text from one entry input
     * and try to match it with the regular expression in the other entry input.
     * Show a result in the output input.
     */
    protected function onClick() {
        $matches = "";
        $haystackString = $this->inputHaystackCtrl->getText();
        $regExToMatch = $this->inputRegexCtrl->getText();
        preg_match($regExToMatch, $haystackString, $matches, PREG_OFFSET_CAPTURE);
        $outputMessages = ["You entered: " . $haystackString . "."];
        $outputMessages[] = "Number of matches: " . count($matches);

        $this->outputCtrl->setText(implode("\n", $outputMessages));
    }

    private $inputHaystackCtrl;
    private $inputRegexCtrl;
    private $outputCtrl;
};

/**
 * Let's build a Wdindow with a form in it
 */
function getRegexFormWindow() {
    $haystackEntry = new MultilineEntry(MultilineEntry::Wrap);
    $regExEntry = new MultilineEntry(MultilineEntry::Wrap);
    $regExEntry->setText("/(foo)(bar)(baz)/");
    $outputEntry = new MultilineEntry(MultilineEntry::Wrap);
    $btnSubmit = new ButtonSubmit("Submit", $haystackEntry, $regExEntry, $outputEntry);

    $entryForm1 = new Form();
    $entryForm1->setPadded(true);

    $entryForm1->append("", new Label("Enter text to match with a reg ex"));
    $entryForm1->append("", new Label(""));
    $entryForm1->append("Text", $haystackEntry, true);

    $entryForm1->append("", new Label(""));
    $entryForm1->append("Reg ex", $regExEntry, true);
   
    $entryForm1->append("", new Label(""));
    $entryForm1->append("", $btnSubmit);

    $entryForm1->append("", new Label(""));
    $entryForm1->append("Output", $outputEntry, true);
    $entryForm1->append("", new Label(""));

    $window = new Window("Regex form", new Size(640, 480), true);
    $window->setMargin(true);
    $window->add($entryForm1);
    return $window;
}

$regExWindow = getRegexFormWindow();
$regExWindow->show();

UI\run();