Saturday, 21 November 2020

OctoberCMS Get Up & Go Guide

OctoberCMS is a neat project for creating online content, written in PHP. I recently had to restart some projects I made with it on a new laptop, so I've made this post basically so I don't have to remember the steps all over again.


Below are some instructions (mainly just for myself) on getting up and running with OctoberCMS on a local machine. This assumes you are using a recent version of Ubuntu and have LAMP installed already.

Create an empty MySQL database


Enter these MySQL commands:
create database test_october1;
create user oct_user@localhost identified by 'enter_password_here';
use test_october1;
grant all on test_october1.* to oct_user@localhost;
flush privileges;


Install required PHP packages:

sudo apt-get update && sudo apt-get install php php-ctype php-curl php-xml php-fileinfo php-gd php-json php-mbstring php-mysql php-sqlite3


Download the OctoberCMS installer file

The local web directory I'm going to be using is just:
/home/scott/ws/php/october_projects/toct1

In a browser, go to octobercms.com/download
Unzip the install-master.zip file
Then copy its contents to your web directory, e.g.:
cp -r /home/scott/Downloads/octobercms/install-master/* .

Set directory permissions:
chown scott:www-data -R october_projects/;
chmod 770 -R october_projects


Set up a virtualhost for the OctoberCMS site using Apache


mkdir /etc/apache2/logging/;
chown -R www-data:www-data /etc/apache2/logging/;
chmod 770 -R /etc/apache2/logging/;

cd /etc/apache2/sites-available/;
nano testoct.localhost.conf


Type this:

<VirtualHost *:80>
 ServerAdmin username@abcs.co.nz
 DocumentRoot "/home/scott/ws/php/october_projects/toct1"
 ServerName testoct.localhost
 ServerAlias www.testoct.localhost
 <Directory "/home/scott/ws/php/october_projects/toct1">
 Options Indexes FollowSymLinks Includes ExecCGI
 AllowOverride All
 Require all granted
 </Directory>
 ErrorLog "logging/testoct-error.log"
 CustomLog "logging/testoct-access.log" common
</VirtualHost>


sudo a2ensite testoct.localhost;
sudo systemctl reload apache2;

sudo nano /etc/hosts


Enter this:
127.0.0.1       testoct.localhost

Run the Install wizard 


In a browser, test this by going to:
http://testoct.localhost/install.php

This will start an install wizard
- you will see a checks screen. If all is OK, push Continue


- Enter the database details and set up the administrator credentials. Continue 


- On the last step, click Start from scratch. This will create an empty installation with a simple demo theme.


You can see a demo page at:

http://testoct.localhost

Go to the admin section:
http://testoct.localhost/backend
-log in
-if you get an error trying to go to the admin page, you might need to enable mode_rewrite for Apache:
sudo a2enmod rewrite


Create content! 


I suggest you can then add some static pages. A good tutorial is here:
https://www.sitepoint.com/getting-started-with-october-cms-static-pages/


 Here's a screenshot of my first OctoberCMS page using my own partials showing up (oh the great CSS, haha):


Friday, 10 April 2020

Get Netbeans browser debugging going with PHP and Xdebug

This was done with Ubuntu v.19.10 and Netbeans v.11.
-got this going in both Firefox and Chromium browsers


Make sure xdebug is installed
sudo apt-get install php-xdebug
-check this works OK in some phpinfo output in a web page


-in your browser, install the XdebugHelper extension/add on
-make sure in the extension's Preferences/Options, set the session key to the preset for Netbeans


Firefox view


Chromium view


-add these lines in the PHP ini file for Xdebug, e.g.
in /etc/php/7.3/apache2/conf.d/20-xdebug.ini:
xdebug.remote_enable=on
xdebug.idekey = netbeans-xdebug
xdebug.remote_host = localhost
xdebug.remote_port = 9000
xdebug.remote_handler = dbgp


You may also want to check your Apache php.ini file for output_buffering=off.

Restart Apache:
systemctl restart apache2

You might have to restart the browser and Netbeans to get this all going
In Netbeans, make sure your project's Properties has the PHP version as the right one (e.g. 7.3). Also the run configuration should be "Local web site (running on local web server" 
Add a breakpoint in a margin
Go to Debug >Debug Project
In browser, go to a page. Click the little extension bug icon, choose Debug


Refresh the page in the browser.

Go back to Netbeans.
-the code execution in the IDE should stop at the line, and highlight the breakpoint line green (with dark theme)
Push F5 / F8 to carry on execution


Saturday, 2 March 2019

A Desktop GUI form with the PHP UI extension

Intro


As a follow on to last week's post, this week I am again exploring out the PHP UI extension which lets you create desktop PHP 7 programs. My mission this time is set up a basic form for letting you type some inputs in boxes, push a button and see an output somewhere else.

What's up, doc?


OK, so the only real documentation the UI extension seems to have (at the time of writing) are some pages on php.net website. There is also the "gallery.php" example file from the project itself, which shows you ways to put elements on a GUI window.


Keep It Simple, Stupid


I just want to make a simple window with a form and button. So, after playing around with some of the ways to do things demonstrated in the "gallery.php", I found out a way for beginners to do things but it's not perfect.

A beginner has a choice of trying things with Box, Group, Grid and Form elements. The Grid element is especially useful because it lets you set a size on elements it will contain, and position it in relation to other elements. However, Form is the thing to stick with when you first try things out. The full source code for the example can be found at the end of this blog post.

At the top of your PHP code file, you will need to insert "use" statements for the elements you're going to put in your window, e.g.

use UI\Window;
use UI\Controls\Form;


Showing Good Form


A Form element is created like this, and you can append more elements within it:

$entryForm1 = new Form();
$entryForm1->setPadded(true);
$entryForm1->append("", new Label("Enter text to match with a reg ex"));


I also want to multiline (MultilineEntry) inputs, which I'll append to the form later:

$haystackEntry = new MultilineEntry(MultilineEntry::Wrap);
$outputEntry = new MultilineEntry(MultilineEntry::Wrap);


I further have the need to put "spacing" rows between lines. I've tried various ways to do this but the quick way to this is just to append a blank Label, which act like an empty row, e.g.

$entryForm1->append("", new Label(""));

Push My Button


It's easy to add a button to a form. However, I need a button that will execute an specific action once its event is triggered, i.e. the button is clicked. To do this, it looks like we have extend the UI's Button class and put in the functionality we need it to do for us. Here's my effort:

/**
 * The class extends the UI's Button class, so there is an onClick method we can
  * use as an event handler.
 */
class ButtonSubmit extends Button {
   
    public function __construct(string $text,
        MultilineEntry $inputHaystackCtrl,
        MultilineEntry $inputRegexCtrl,
        MultilineEntry $outputCtrl
    ) {
        $this->inputHaystackCtrl = $inputHaystackCtrl;
        $this->inputRegexCtrl = $inputRegexCtrl;
        $this->outputCtrl = $outputCtrl;

        parent::__construct($text);
    }
   
    /**
     * When the button is clicked, take the "haystack" text from one entry input
     * and try to match it with the regular expression in the other entry input.
     * Show a result in the output input.
     */
    protected function onClick() {
        $matches = "";
        $haystackString = $this->inputHaystackCtrl->getText();
        $regExToMatch = $this->inputRegexCtrl->getText();
        preg_match($regExToMatch, $haystackString, $matches, PREG_OFFSET_CAPTURE);
        $outputMessages = ["You entered: " . $haystackString . "."];
        $outputMessages[] = "Number of matches: " . count($matches);

        $this->outputCtrl->setText(implode("\n", $outputMessages));
    }

    private $inputHaystackCtrl;
    private $inputRegexCtrl;
    private $outputCtrl;
};


Then add my button to the form:

$entryForm1->append("", $btnSubmit);

Open the Window


$window = new Window("Regex form", new Size(640, 480), true);
$window->add($entryForm1);

Then call the window show() method, and start the UI interaction loop:

UI\run();

When you run your php program, you'll see your form window appear. You'll also probably notice that the button element is unusually wide; we can't resize it. I did say the Form element was good to learn but not perfect ;-)


Get Trigger Happy


Enter some text in the "Text" mulitline input. The click the Submit button to see if the event gets triggered.


So, there you have it - a simple form with a button that executes an event. It might not be a competitor for Windows Forms, but it's a start.

Full Source Code


<?php
use UI\Size;
use UI\Window;
use UI\Controls\Form;
use UI\Controls\Button;
use UI\Controls\MultilineEntry;
use UI\Controls\Label;


// Lets make a button with custom features to handle inputs
/**
 * The class extends the UI's Button class, so there is an onClick method we can
  * use as an event handler.
 */
class ButtonSubmit extends Button {
   
    public function __construct(string $text,
        MultilineEntry $inputHaystackCtrl,
        MultilineEntry $inputRegexCtrl,
        MultilineEntry $outputCtrl
    ) {
        $this->inputHaystackCtrl = $inputHaystackCtrl;
        $this->inputRegexCtrl = $inputRegexCtrl;
        $this->outputCtrl = $outputCtrl;

        parent::__construct($text);
    }
   
    /**
     * When the button is clicked, take the "haystack" text from one entry input
     * and try to match it with the regular expression in the other entry input.
     * Show a result in the output input.
     */
    protected function onClick() {
        $matches = "";
        $haystackString = $this->inputHaystackCtrl->getText();
        $regExToMatch = $this->inputRegexCtrl->getText();
        preg_match($regExToMatch, $haystackString, $matches, PREG_OFFSET_CAPTURE);
        $outputMessages = ["You entered: " . $haystackString . "."];
        $outputMessages[] = "Number of matches: " . count($matches);

        $this->outputCtrl->setText(implode("\n", $outputMessages));
    }

    private $inputHaystackCtrl;
    private $inputRegexCtrl;
    private $outputCtrl;
};

/**
 * Let's build a Wdindow with a form in it
 */
function getRegexFormWindow() {
    $haystackEntry = new MultilineEntry(MultilineEntry::Wrap);
    $regExEntry = new MultilineEntry(MultilineEntry::Wrap);
    $regExEntry->setText("/(foo)(bar)(baz)/");
    $outputEntry = new MultilineEntry(MultilineEntry::Wrap);
    $btnSubmit = new ButtonSubmit("Submit", $haystackEntry, $regExEntry, $outputEntry);

    $entryForm1 = new Form();
    $entryForm1->setPadded(true);

    $entryForm1->append("", new Label("Enter text to match with a reg ex"));
    $entryForm1->append("", new Label(""));
    $entryForm1->append("Text", $haystackEntry, true);

    $entryForm1->append("", new Label(""));
    $entryForm1->append("Reg ex", $regExEntry, true);
   
    $entryForm1->append("", new Label(""));
    $entryForm1->append("", $btnSubmit);

    $entryForm1->append("", new Label(""));
    $entryForm1->append("Output", $outputEntry, true);
    $entryForm1->append("", new Label(""));

    $window = new Window("Regex form", new Size(640, 480), true);
    $window->setMargin(true);
    $window->add($entryForm1);
    return $window;
}

$regExWindow = getRegexFormWindow();
$regExWindow->show();

UI\run();


Thursday, 28 February 2019

Desktop PHP 7 with the UI extension & libui

Introduction


You may be like me and want to write your own desktop GUI programs with PHP 7 (i.e. not web programs in a browser). There are various options out there but many seem to have been abandoned or stuck with support only at PHP 5. In my search for desktop goodness I found the PHP extension "UI", which is a wrapper around a neat C library for creating desktop programs, "libui". The UI extension has the advantage of working with PHP 7.x.

The libui project can be found here.

 The PHP UI extension project can be found here.

What follows are instructions on how to first install libui, then the UI extension for PHP. I'm assuming you've got a bog standard PHP 7.2 set up already. I've tested this all out in Ubuntu 18.04 (and Lubuntu). I'm using the vim editor here, but you can try whichever editor suits you.

The C library, libui


On the command line, install packages:

sudo apt-get install build-essential cmake pkg-config libgtk-3-dev re2c git php7.2-dev


Then let's clone the libui project:

cd /opt
git clone https://github.com/andlabs/libui.git
cd libui
git checkout alpha3.5


And then compile the project:


mkdir build
cd build
cmake ..
make


Try it out:

View one of the example source C files that generates a windows with controls:

vim ../examples/controlgallery/main.c

Compile the example libui programs:


make examples
ls out

--> see the compiled files in the out directory

To run one:
out/controlgallery
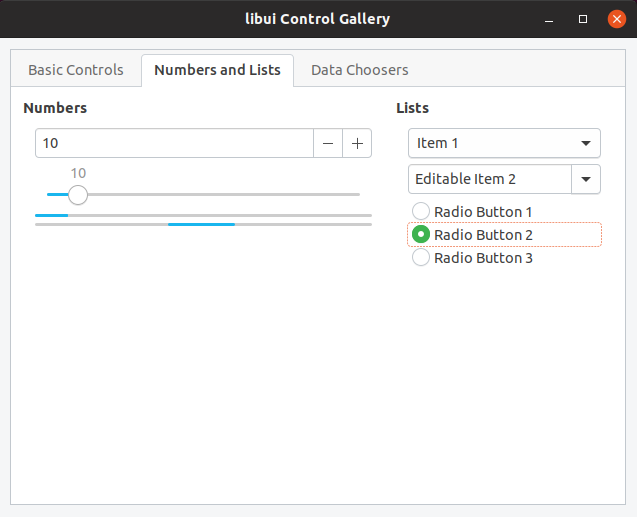
--> see a window appear with example controls


Make the libui library available elsewhere:

sudo install ui.h /usr/local/include/;
sudo install ui_unix.h /usr/local/include/;
sudo install build/out/libui.so /usr/lib/;
sudo install build/out/libui.so.0 /usr/lib/;


The PHP UI extension

I had problems with errors when trying to install this as a PECL extension. So instead, let's manually clone the UI project:

cd /opt
git clone git://github.com/krakjoe/ui;
cd ui


There's a fix we have to make. Change a line in a file:

vim classes/box.c

Perform a line alteration near this:

#if PHP_VERSION_ID >= 70200
-ZEND_BEGIN_ARG_WITH_RETURN_TYPE_INFO_EX(php_ui_box_is_padded_info, 0, 0, _IS_BOOL, NULL, 0)
+ZEND_BEGIN_ARG_WITH_RETURN_TYPE_INFO_EX(php_ui_box_is_padded_info, 0, 0, _IS_BOOL, 0)


Configure & compile the extension:

phpize
./configure
make


Find your PHP extensions directory:

php-config --extension-dir

--> e.g. see:
/usr/lib/php/20170718

Copy the compiled file to the PHP extensions directory:

cp modules/ui.so /usr/lib/php/20170718/

Configure PHP to use the extension:

Add an "ini" file for the extension:
vim /etc/php/7.2/mods-available/ui.ini
enter:
extension=ui.so

sudo phpenmod ui

php --ri ui

-see is enabled

See example PHP code to show a window with some controls:

vim examples/gallery.php

Run the example PHP file and try stuff out with your new PHP desktop greatness!

php examples/gallery.php


Next time I'll post an entry on writing a desktop app with UI. See the next post.

Note, thanks to this forum post below for help on getting things going:
https://github.com/krakjoe/ui/issues/43


Monday, 18 September 2017

Using Log4Net to Log to a File for ASP.NET MVC

There are things I'd like to blog about nearly every week. This week I thought I'd actually get around to doing it, about a simple thing that really should have clearer instructions elsewhere online. We're going to use the Log4Net package to log information in an output file, in an ASP.NET MVC controller. For this example, I used log4net version 2.

First, using the NuGet package manager, install the package for log4net into your project.

Put this line in the file AssemblyInfo.cs:

[assembly: log4net.Config.XmlConfigurator(Watch = true)]

Put this line in the file global.asax:

log4net.Config.XmlConfigurator.Configure();

Put this in the web.config file:

<configSections>
  ...
  <section name="log4net" type="log4net.Config.Log4NetConfigurationSectionHandler, log4net" />
</configSections>

  <log4net debug="true">
    <appender name="RollingLogFileAppender" type="log4net.Appender.RollingFileAppender">
      <file value="Logs/log.log" />
      <appendToFile value="true" />
      <rollingStyle value="Size" />
      <maxSizeRollBackups value="10" />
      <maximumFileSize value="100KB" />
      <staticLogFileName value="true" />
      <layout type="log4net.Layout.PatternLayout">
        <conversionPattern value="%-5p %d %5rms %-22.22c{1} %-18.18M - %m%n" />
      </layout>
    </appender>
    <root>
      <level value="DEBUG" />
      <appender-ref ref="RollingLogFileAppender" />
    </root>
  </log4net>

Rebuild the solution/project.

Put the logging commands in a class method, e.g. a controller:

using log4net;

public class MyController : Controller {
    ILog log = LogManager.GetLogger(typeof(MyController));
    log.Debug("* Debug message");
    log.Warn("* Warning message");
    log.Error("* Error message");
    log.Info("* Information message");
}

Run the application (push F5).

Check the project root for a new folder and a log file, named "log.log". Done!


Saturday, 24 June 2017

TimeSpans, Ticks and BigInts for C#, SQL Server & NHibernate

I'm writing this post about the data type for C# called TimeSpan. The gist of this article is that it's easy to create a TimeSpan in C# and get information about it, but it's tougher to do the same thing for storing its "ticks" units using SQL in a SQL Server database field.

A TimeSpan is not a complicated concept, you may think. It stores the number of units of time up to a point in a certain time range, usually within one day. The units are called "ticks". Here's my example, creating a TimeSpan for the time on a day of 2:30pm.

TimeSpan tSpan = new TimeSpan(14, 30, 00);
Console.WriteLine("Ticks in the TimeSpan: " + tSpan.Ticks);

The output is: 522000000000, i.e. that many ticks have occurred since the start of the time range (midnight, or 00:00:00).

Now, some of  you may have the "privilege" of using the SQL ORM for C#, NHibernate. You'll notice that what NHibernate does for storing TimeSpans in a SQL Server database is convert them into BIGINT numbers. The reason for this, I'm guessing, is that the number of ticks can end up very large for representing a TimeSpan.

If you do a SELECT query on a database table which you've mapped through NHibernate, you would see that number of ticks stored in there when you save your save your entity and execute your session transaction (i.e. ticks is 522,000,000,000).

Now, the key to converting a C# TimeSpan to a BIGINT with SQL is this next number. Once I knew it, it was plain sailing:

The number of ticks in one day = 864,000,000,000

To help you deal with that total-ticks-in-one-day figure, you also need to calculate the number of seconds in one day:

The number of seconds in one day = 86,400
(ie. 60 seconds x 60 minutes x 24 hours)

Now, when you calculate the total ticks in one day divided by the total seconds in one day, you get this number:

The number of ticks per second = 10,000,000
(i.e. 864000000000 ticks / 86400 seconds)

So, from there, stop and think. If you can get your TimeSpan's hours, minutes and seconds, all you will need to do to turn this into a total number of ticks is:

  • convert each figure's value into a total number of seconds
  • multiple the sum of all these seconds values by 10,000,000

e.g. for my 2:30pm TimeSpan:

((14 * 60 * 60) + (30 * 60) + 0 * 10000000
= 522000000000

That figure is that same as the one NHibernate stored. We're on the right track! So, let's turn this into a Transact-SQL statement, for inserting a record with those calculations in it. I'm going to declare my hour, minutes and seconds values as variables beforehand.

GO
declare @myHours int = 14;
declare @myMinutes int = 30;
declare @mySeconds int = 0;
declare @ticksPerSecond bigint = 10000000;
INSERT INTO [dbo].[MyTable]
     (
     [TimeOfDay]
     )
     VALUES
     (
     ((@myHours * 60 * 60) + (@myMinutes * 60) + (@mySeconds)) * @ticksPerSecond
     )
GO

My desired result (of 522,000,000,000) for the TimeOfDay field appears in the database correctly. T-SQL stores the value as a BIGINT in the same way that NHibernate stores a C# TimeSpan.


Friday, 9 October 2015

Crawling with OpenWebSpider

Spiderman, Where are You Coming From Spiderman?

Sometimes you just need the right tools to help you do what you want. This is especially true when the tool you are limited to has a bunch of restrictions. I ran into this particular problem the other day when I wanted to "spider" a website to find out all its possible URLs being served, including the URLs that are ignored by the usual "robots.txt" file sitting on the web server.

I actually had to find a way around the "robots.txt" file for a web site that was blocking web crawlers from finding most of the URLs that were available. Imagine a spider that is crawing through a tunnel, looking for all the tasty bugs - and there is a giant boulder in the way providing the biggest obstacle possible to getting those bugs it wants to feed on.

My requirements for a spider alternative (if possible) were:
  • free
  • no lengthy configuration
  • a GUI
  • a way of ignoring the "robots.txt" file's instructions
  • the search results in a spreadsheet file
  • able to run on Windows (and Linux too, if possible)
After some googling, I experienced true frustration at only being able to find command-line libraries or gigantic, enterprise-level Java applications. Then I came across an open source project named OpenWebSpider. The project's website is a bit confusing but it's worth persevering through.

OpenWebSpider is a neat application written in node.js, which crawls a website and saves its results to a database that you nominate. The project seems to be reasonably active and at the time of writing is hosted on SourceForge. To get the application going in Windows, first you'll need to do a few things.

Install WAMP Server

OK, so the database I wanted to store my results in was MySQL. One of the best ways to get this (and other nice bits) in Windows is to install the handy WAMP server package. (However, the providers do warn you that you might first need a Visual Studio C++ 2012 redistributable package installed.)

One you do get WAMP Server installed, you'll have a nice new "W" icon in your system tray. Click on it, then click Start All Services.


You can view the MySQL database in the phpMyAdmin interface, just to be nice and friendly. In your browser then, go to:
http://localhost/phpmyadmin

Note: if you have any troubles with phpMyAdmin, you might have to edit its config file, usually in this location:
C:\wamp\apps\phpmyadmin4.x\config.inc.php

In phpMyAdmin, create a database to store your spidering results (I've named my database "ows"). Also create a user for the database.

Install node.js

Node.js is one of the most wonderful Javascript frameworks out there, and it's what OpenWebSpider is written with. So go to the node.js project site, download the installer and run it. Check that node.js is working OK by opening a command shell window and typing the word "node".


Get OpenWebSpider and Create the Database's Schema

Download the OWS zip file from Sourceforge. Unzip the file. Inside the project folder, you'll see a number of files. Double-click the "openwebspider.bat" file to launch the application in a little shell window.


Then, as the readme.txt instruction file tells you:
  • Open a web-browser at http://127.0.0.1:9999/
  • Go in the third tab (Database) and configure your settings
  • Verify that openwebspider correctly connects to your server by clicking the "Verify" button
  • "Save" your configuration
  • Click "Create DB"; this will create all tables needed by OpenWebSpider

Now, check your database's new tables in phpMyAdmin:


 Start Spidering!

Go to the OWS browser view, ie. at http://127.0.0.1:9999/. Click on the Worker tab and alter any settings you might thing useful. Enter the URL of the site you want to crawl in the URL box (and make sure "http://www" is in front if needed). Then hit the Go! button.
You should then be bounced to the Workers tab. Here you'll get see real-time progress of the site crawling as it happens. You can click on the second-tier History tab if you miss the crawler finishing its run.

View Your Results

In phpMyAdmin, click on the pages table and you should automatically see a view of the crawling results. You might not need all the columns you'll see, in fact my usual SQL query to run is just something like:
select hostname, page, title from pages where hostname = 'www.website.com';


And of course, anyone with half a brain knows you can export data from phpMyAdmin as a CSV file. Then you can view your data by importing the CSV file into a spreadsheet application.


Ignore Those Pesky Robots

Please note, the next instruction is for the version of OpenWebSpider from October 2015. It probably is outdated for the latest version now.

One of the requirements was that we could bypass the "robots.txt" file, which good web crawlers by default must follow. What you'll need to do is close OpenWebSpider, and just edit one source code file. Find this file and open it up in a text editor: openwebspider\src\_worker\_indexerMixin.js.

It's a Javascript file, so all you need to do is comment out these lines (with // symbols):
 // if (!canFetchPage || that.stopSignal === true)
        // {
            // if (!canFetchPage)
            // {
                // msg += "\n\t\t blocked by robots.txt!";
            // }
            // else
            // {
                // msg += "\n\t\t stop signal!";
            // }

            // logger.log("index::url", msg);


            // callback();

            // return;
        // }

Re-save the file. Then launch OWS again, and try another search. You'll usually find the number of found URL results has gone up, since the crawler is now ignoring the instructions in the "robots.txt" file.

Everyday Use

It's a good idea to make a desktop shortcut for the "openwebspider.bat" file. So, if you want to use OpenWebSpider regularly, what you'll need to remember to do each time you need it is:
  • Start up the WAMP server in the system tray
  • On the desktop, double-click the "openwebspider.bat" shortcut icon
  • In a browser, go to localhost:9999 (Openwebspider) to run the worker
  • In a browser, go to localhost/phpmyadmin to see your results

Happy spidering!